---
title: "ChatGPT desktop quickstart"
description: "Install the ChatGPT desktop app, choose between Chat, Work, and Codex, connect the right files, and complete a first reviewable task."
reviewedOn: 2026-09-16
sourceRefs:
- evidence-lab-methodology
- openai-codex-quickstart
- openai-chatgpt-desktop-app
- openai-chatgpt-work
- openai-chatgpt-projects
- openai-codex-environments
---
## Result
In one route, you install the ChatGPT desktop app, sign in, choose the right working surface, connect only the files or tools the task needs, and produce a result you can review. You do not need Codex CLI or an IDE extension for this quickstart.
## The route at a glance
1. Install ChatGPT and sign in.
2. Choose **Chat**, **Work**, or **Codex** from the result you need.
3. Choose cloud or local work, then add a project, folders, files, or plugins only when the task requires them.
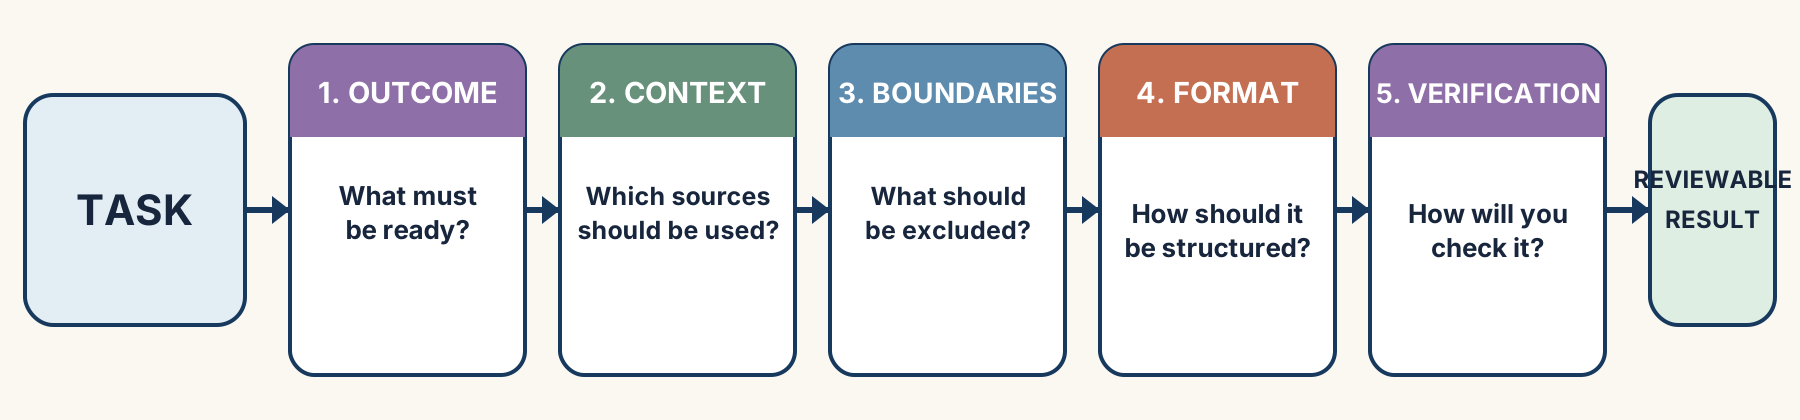
4. Describe the outcome, context, boundaries, format, and check.
5. Inspect the result before treating it as finished.
## 1. Install the desktop app and sign in
1. Open the official [ChatGPT desktop app page](https://learn.chatgpt.com/docs/app).
2. Download ChatGPT for macOS or Windows, or follow the linked Linux installation guide.
3. Install and open **ChatGPT** through the normal application launcher.
4. Sign in with your ChatGPT account.
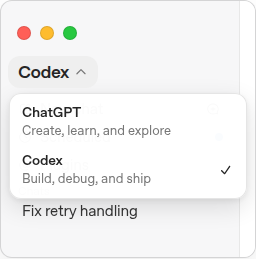
5. Open the product selector. Choose **ChatGPT** for Chat or Work, or **Codex** for the technical working environment.
Official OpenAI interface: the top-level selector switches between ChatGPT and Codex.
Feature availability depends on the account and workspace. If Work or Codex is missing, the installation may still be correct; record what is available and continue with the surfaces you can access.
## 2. Choose Chat, Work, or Codex
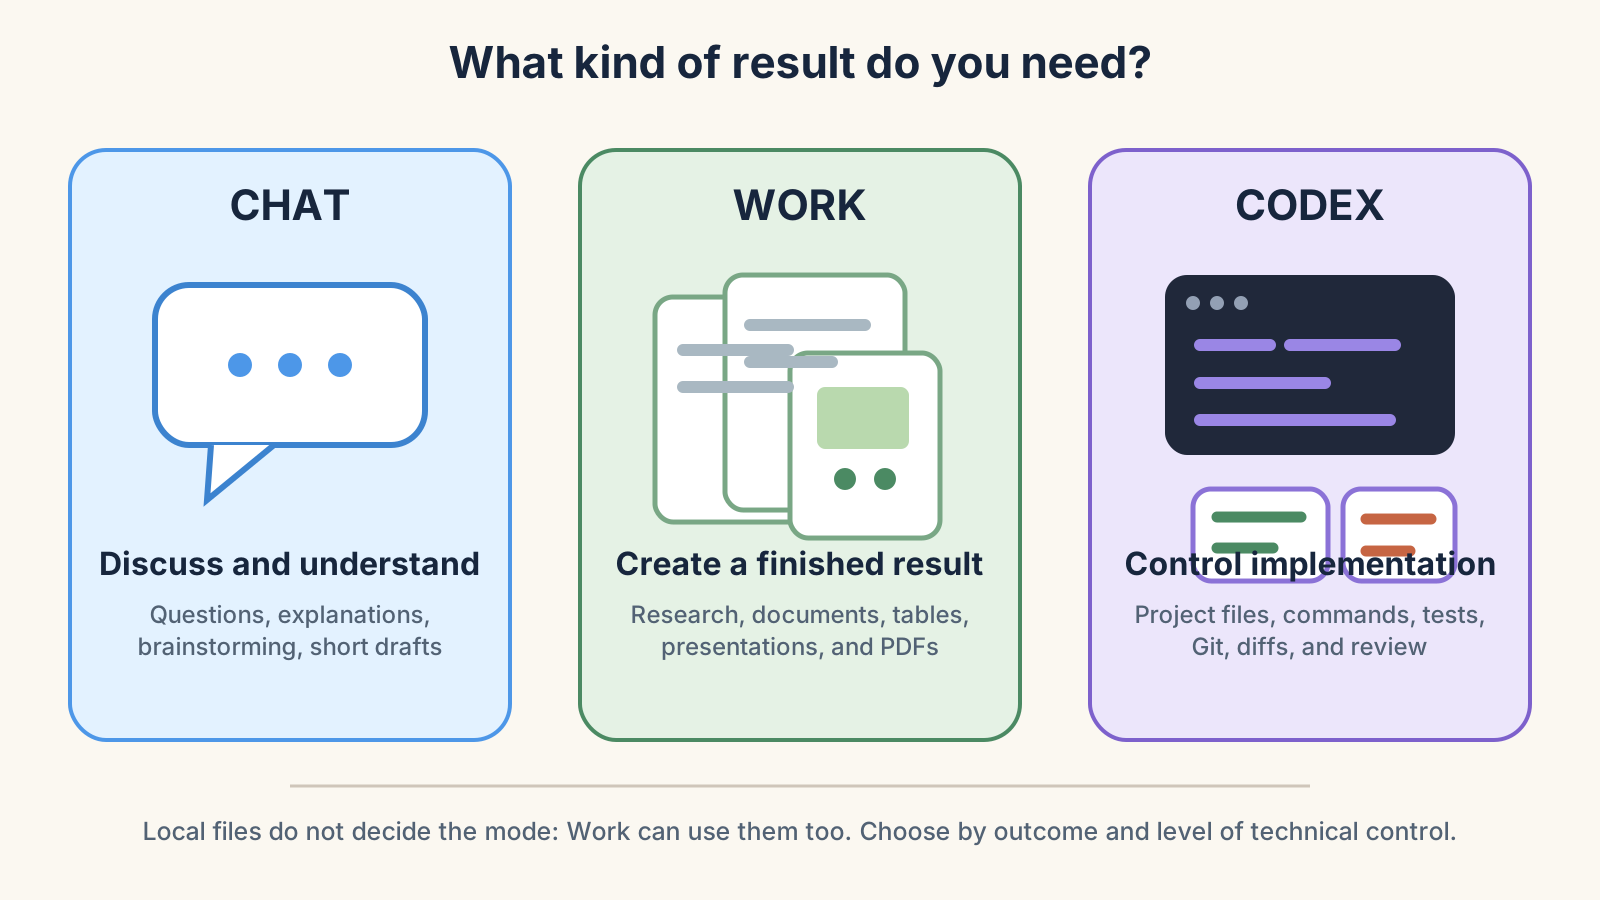
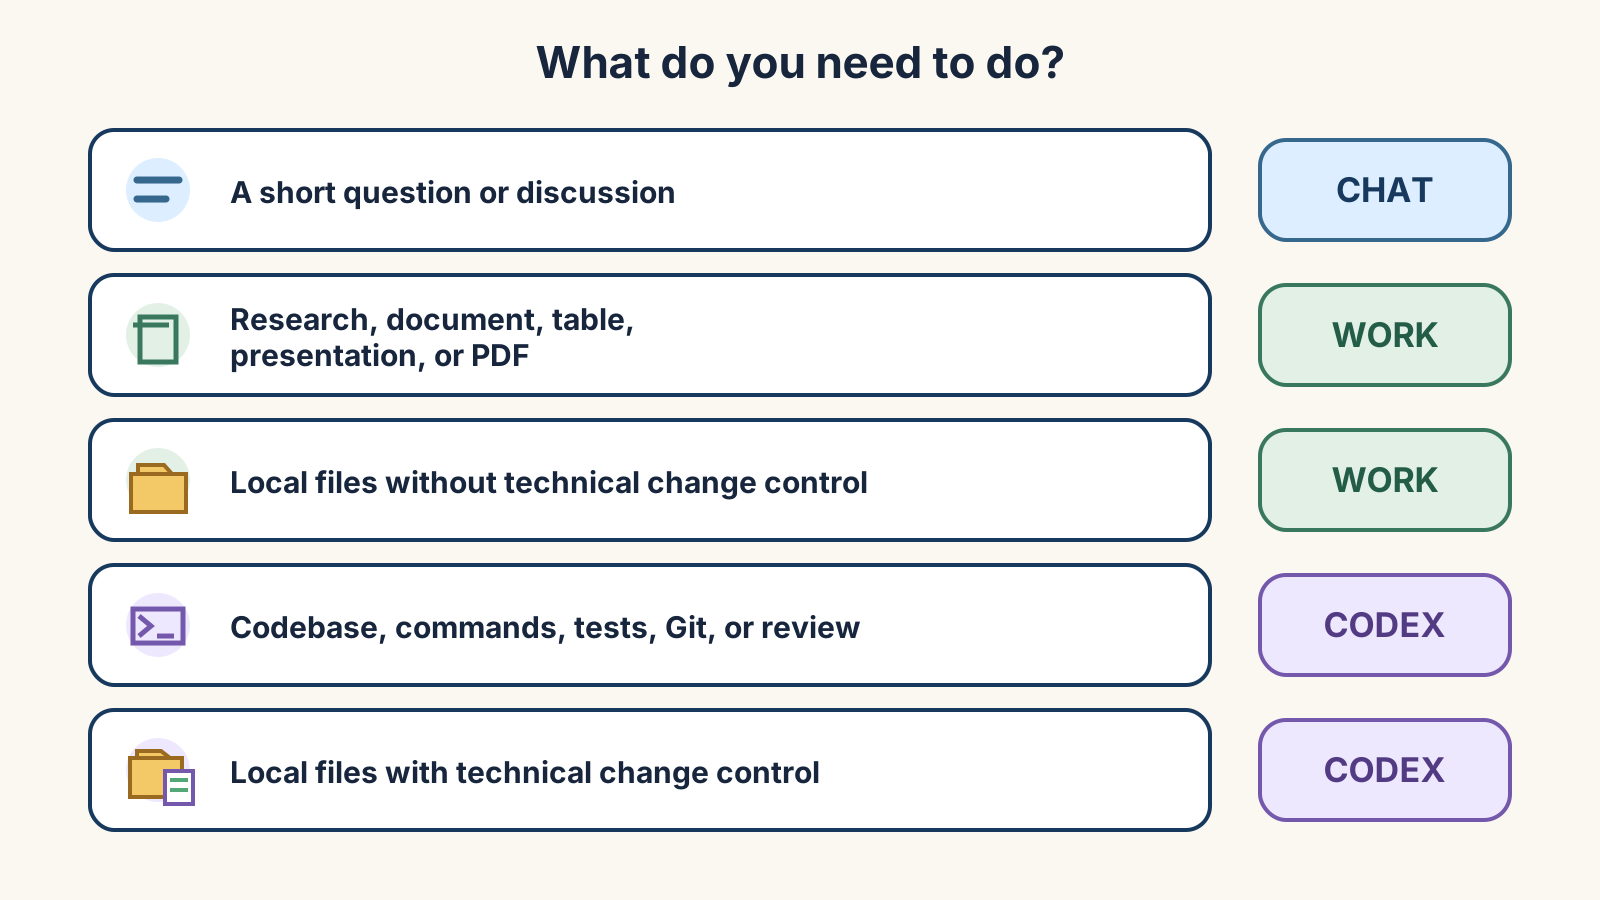
Choose by the result and the amount of technical control you need, not by file location alone. Work can use local files in the desktop app when local tools are available.
Chat is for conversation, Work for a finished deliverable, and Codex for implementation with technical visibility.
| Surface | Start here when you need | Typical result |
| --- | --- | --- |
| **Chat** | A question, explanation, brainstorm, comparison, or short rewrite | A conversational answer |
| **Work** | Research or a multi-step task that should end in a reviewable deliverable | A document, spreadsheet, presentation, PDF, workflow, or recurring update |
| **Codex** | Project files, commands, tests, Git, diffs, review, or explicit environment control | Implemented and checked changes with technical evidence |
Work and Codex overlap. A document task can be completed in either. Prefer Work when you mainly want the result; prefer Codex when you also want to inspect how the project files, commands, tests, and changes were handled.
## 3. Choose where the task runs
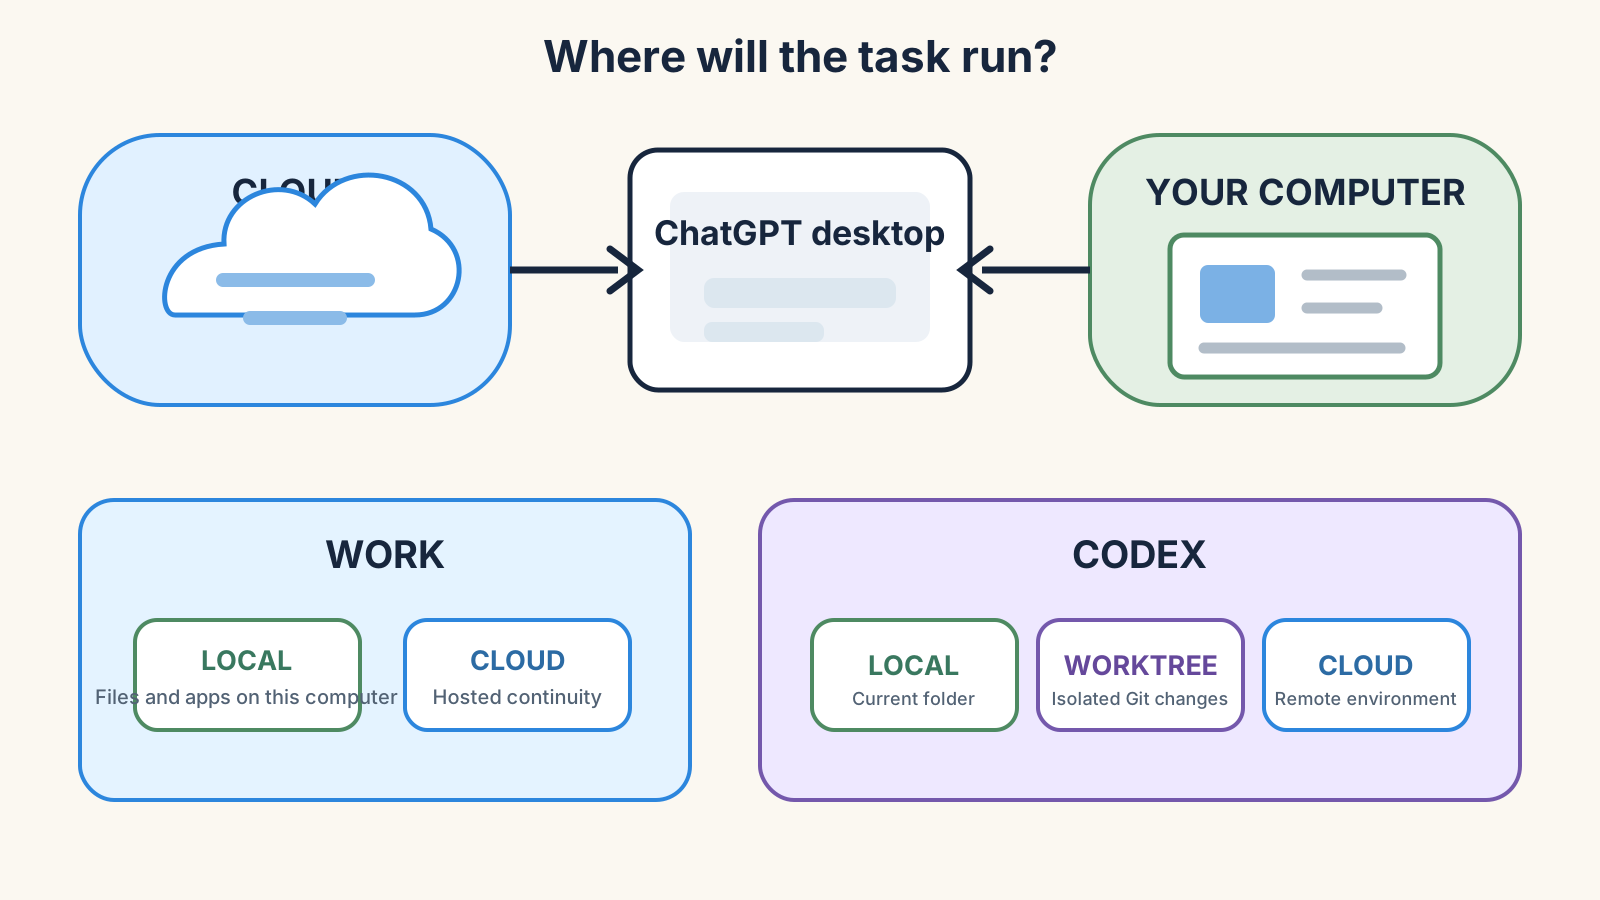
Work can run locally in the desktop app or in the cloud when that option is available. Keep **Work locally** selected when the task needs files or apps on your computer. Choose **Cloud** when the task can use uploaded or connected context and should continue after the computer or app is closed.
Codex exposes three environments:
- **Local** works directly in the current project directory.
- **Worktree** creates an isolated Git worktree on the same computer.
- **Cloud** runs in a configured remote environment.
Local access is available in Work as well as Codex. Codex additionally makes Local, Worktree, and Cloud explicit.
## 4. Choose a project, folder, or standalone chat
Use the smallest workspace that carries the context you need:
- Start a **standalone chat** for one self-contained request.
- Use a **ChatGPT project** when several chats need the same uploaded files, instructions, or connected sources.
- Use a **local project** when the desktop task needs one or more folders on your computer.
In a local project, open **Edit project** to add folders. Choose **Make primary** for the folder that new chats and Codex should use by default. A ChatGPT project does not automatically provide direct access to a computer folder; upload or connect the required sources.
## 5. Use Work for a finished deliverable
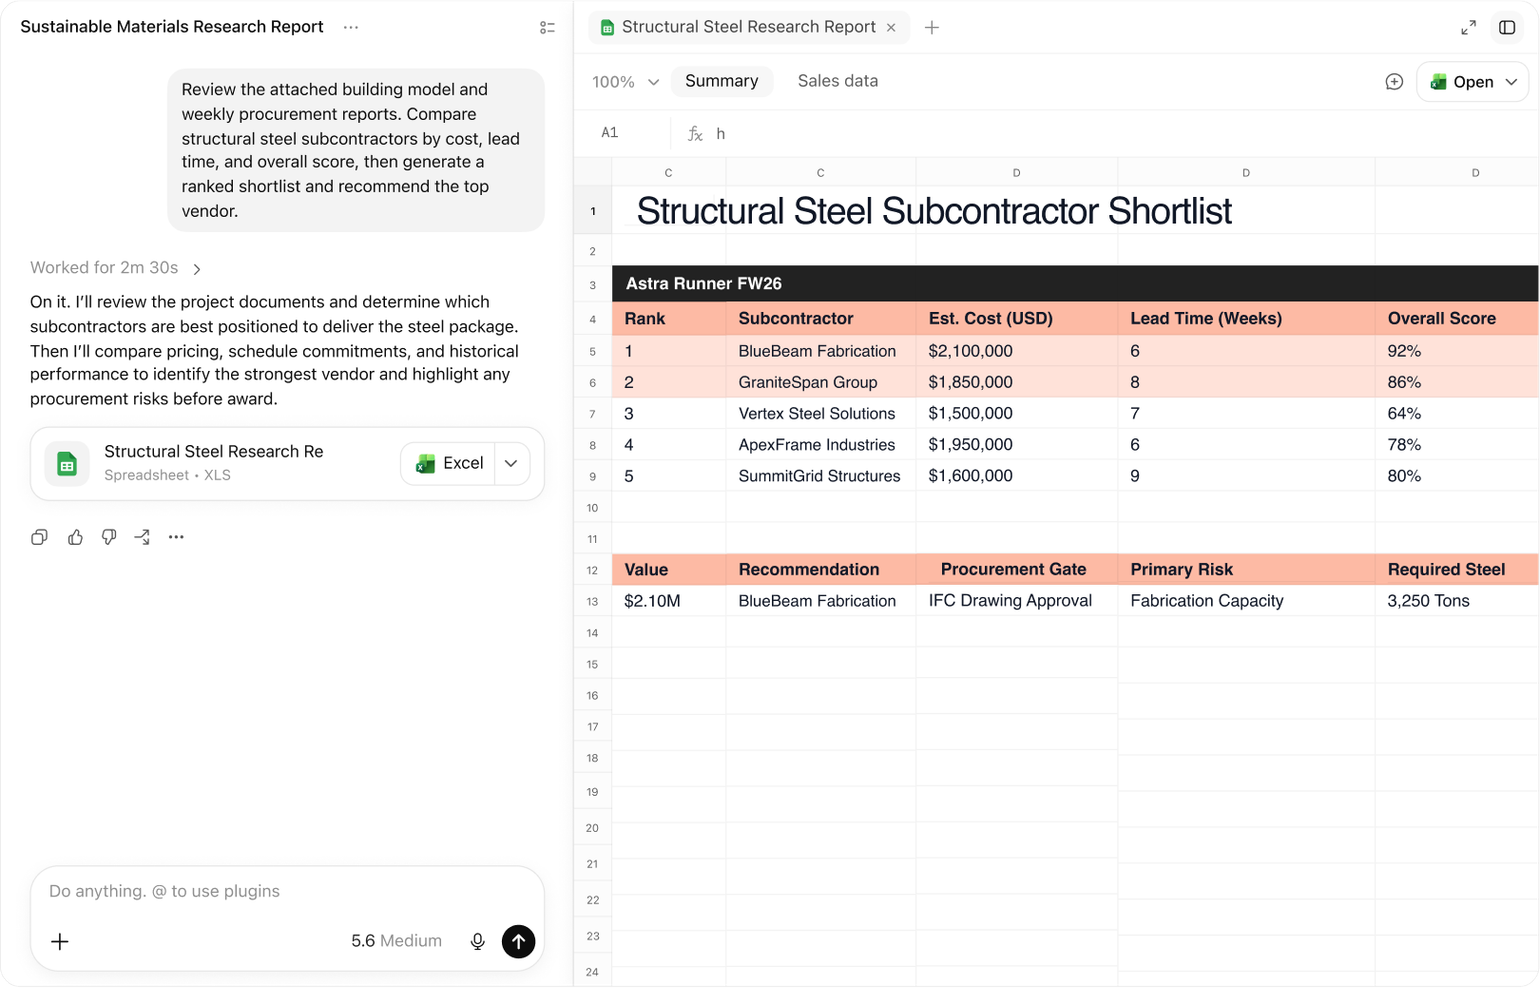
Work is the default starting point for substantial everyday tasks: research, analysis, documents, spreadsheets, presentations, PDFs, Sites, and workflows. Give it a defined result, a bounded source set, and a clear review point.
Official OpenAI interface: the request and a reviewable result remain visible together.
Use Work when you want to:
- research and compare sources;
- create a document, spreadsheet, presentation, PDF, or visual result;
- keep refining a deliverable in the same chat;
- run a longer or recurring task with an explicit outcome.
## 6. Use Codex when technical control matters
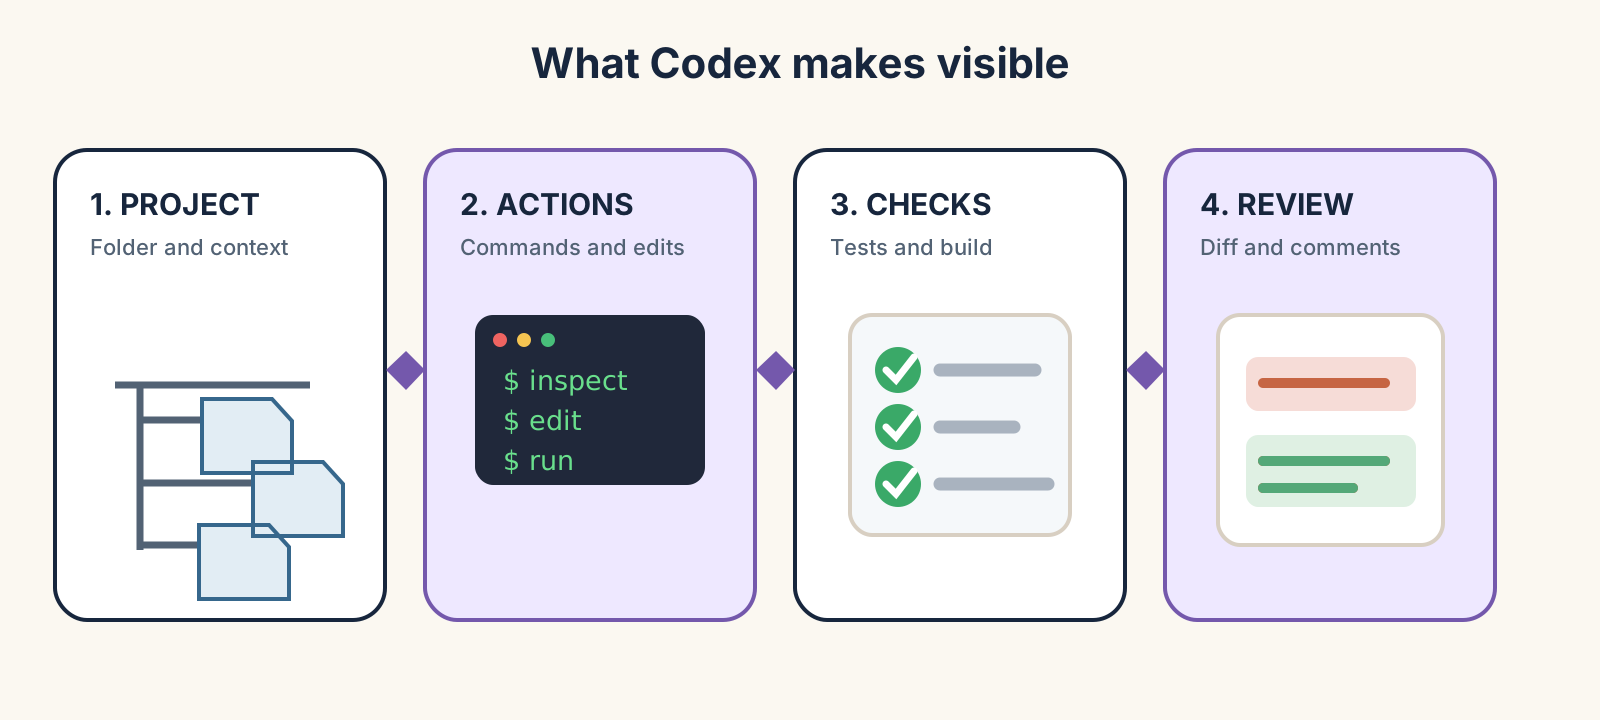
Codex makes the implementation layer visible: the working folder, environment, commands, file changes, checks, diff, and review comments.
A Codex task starts from the project context, performs visible actions, runs checks, and ends in review.
Choose Codex when the task is tied to a project folder, you need commands or tests, or you want line-by-line review of changes. For an ordinary document where you do not need technical change control, Work is usually the simpler route.
## 7. Add files and plugins
Provide context in the narrowest useful way:
- attach a file to one chat for a one-off task;
- add files or instructions to a project when several chats need them;
- open or attach a local folder when the task must read or change computer files;
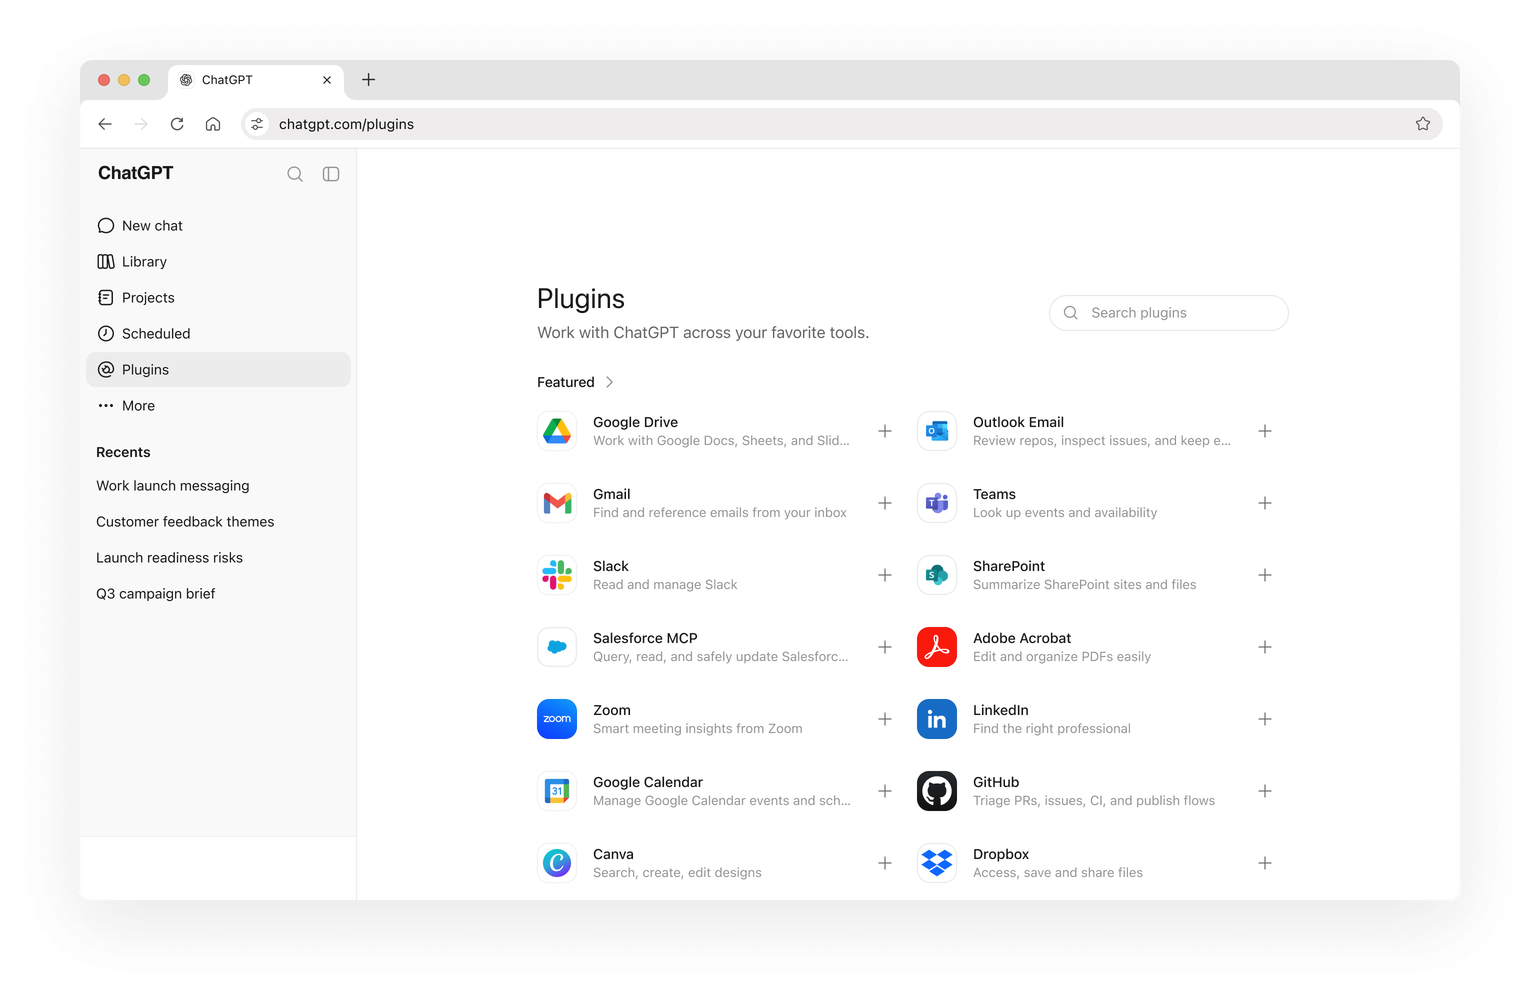
- install a plugin when the task needs an external service such as Google Drive, SharePoint, Slack, or another available tool.
Official OpenAI interface: available plugins depend on the account and workspace.
## 8. Write a request that can be checked
A good request does not need special commands. It needs five concrete parts.
Define the result before naming the interface.
Example:
> Prepare a two-page analytical memo from the attached documents. Do not add external facts. Start with a short summary, then provide a table of findings. Cite the source for every finding.
## Actions
1. Install ChatGPT from the official download route and sign in.
2. Open the selector and confirm which of Chat, Work, and Codex are available.
3. Choose one small real task with a clear output, such as a two-page memo or a five-row comparison table.
4. Choose Chat, Work, or Codex from the expected result and the technical visibility you need.
5. Choose local or cloud execution, then select a standalone chat, ChatGPT project, or local project.
6. Add only the files, folders, or plugins the task needs, and write the request using the five-part structure above.
7. Open the result, compare it with the source material and requested format, and ask for one focused correction if needed.
## Everyday routing map
When several modes could work, choose the simplest one that gives you the required result and evidence.
## Check
- ChatGPT opens and you can sign in without an installation error.
- You find Chat and Work under ChatGPT and select Codex from the product selector.
- You can explain why Work can use local files and why local files alone do not require Codex.
- You know where the task runs and where new or changed files will appear.
- The result matches the requested outcome, source boundary, format, and verification rule.
## If it fails
- **Work or Codex is missing.** Check account and workspace availability; this is not necessarily an installation failure.
- **A local file is unavailable.** Confirm that the task is local and that the correct folder is attached to the project. Cloud tasks do not automatically receive access to files on the computer.
- **Worktree is unavailable.** Use it only inside a Git repository; otherwise choose Local or Cloud.
- **The result is too broad or generic.** Rewrite the request with a named output, allowed sources, exclusions, format, and a concrete check.
- **You cannot tell what changed.** Move the task to Codex when you need commands, tests, Git, a diff, or line-by-line review.
## Sources and verification
This quickstart was checked on 16 September 2026 against the official [ChatGPT quickstart](https://learn.chatgpt.com/docs/quickstart), [desktop app guide](https://learn.chatgpt.com/docs/app), [ChatGPT Work guide](https://learn.chatgpt.com/docs/get-started-with-work), [projects guide](https://learn.chatgpt.com/docs/projects), and [Codex environment guide](https://learn.chatgpt.com/docs/environments/modes). Product labels and availability can change by platform, account, region, rollout, and workspace settings.
The interface screenshots are reproduced from official OpenAI documentation. The decision diagrams are Evidence Lab teaching materials.
**Continue with the detailed route:** [Sign in and verify access](/en/onboarding/sign-in-and-verify-access/).